Download GambOS 2.0 build 27 image.
GambOS 2.0 build 27 for Raspberry Pi 4B and 5.
This image is suited for Pi model 4B AND 5. It comes as a downloadable compressed archive that, once extracted, needs to be put on a microSD card.
Install GambOS 2.0 build 27 image.
This part provides step-by-step instructions for using the GambOS 2.0 build 27 educational preseed image on a Raspberry Pi model 4B and model 5.
GambOS 2.0 build 27 requirements for Raspberry Pi 4B.
Requirements:
- A Raspberry Pi Model 4B (8GB version recommended for performace reasons.)
- A 32 GB (or bigger) microSD card (look for the highest transfer speed Class 10 cards for performace reasons).
- A Linux system to install the image onto the microSD card.
GambOS 2.0 build 27 requirements for Raspberry Pi 5.
Requirements:
- A Raspberry Pi Model 5 (min. 8GB version, 16GB version recommended.)
- A 32 GB (or bigger) microSD card (look for the highest transfer speed Class 10 cards for performace reasons).
- A Linux system to install the image onto the microSD card.
Extract, start a terminal, determine the target.
Ensure the microSD card is inserted into your Linux system. Extract your downloaded archive to a folder of choice. Next open a terminal and type:
In terminal:
cd /folder/of/choice
lsblk
On my system using above command the microSD card turns up as:
- /dev/sda, if a USB based microSD card reader is used.
- /dev/mmcblk0, if using the direct microSD card reader build into my system.
NAME MAJ:MIN RM SIZE RO TYPE MOUNTPOINTS
sda 8:0 1 28,3G 0 disk
nvme0n1 259:0 0 465,8G 0 disk
├─nvme0n1p1 259:3 0 512M 0 part /boot/efi
├─nvme0n1p2 259:4 0 464,3G 0 part /
└─nvme0n1p3 259:5 0 976M 0 part [SWAP]
nvme1n1 259:1 0 465,8G 0 disk
└─nvme1n1p1 259:2 0 465,8G 0 part /home
NAME MAJ:MIN RM SIZE RO TYPE MOUNTPOINTS
mmcblk0 179:0 0 28,3G 0 disk
nvme0n1 259:0 0 465,8G 0 disk
├─nvme0n1p1 259:3 0 512M 0 part /boot/efi
├─nvme0n1p2 259:4 0 464,3G 0 part /
└─nvme0n1p3 259:5 0 976M 0 part [SWAP]
nvme1n1 259:1 0 465,8G 0 disk
└─nvme1n1p1 259:2 0 465,8G 0 part /home
You might get a different output, just make sure to use the proper one and not to write to your hard drive!
Write the image to the microSD card.
WARNING: Ensure you have an up-to-date backup of the data on the computer, as incorrect use of the dd command could wipe the wrong disk.
I will give 2 examples, one based on /dev/sda the other based on /dev/mmcblk0:
In terminal:
sudo dd if=gambos-2.0-build-27-bookworm-mate-arm64-rpi.img of=/dev/sda bs=1M oflag=dsync status=progress
In terminal:
sudo dd if=gambos-2.0-build-27-bookworm-mate-arm64-rpi.img of=/dev/mmcblk0 bs=1M oflag=dsync status=progress
If succesfull, when mounted on your system, you should have 2 partions, one named RASPIROOT, the other named RASPIFIRM. One is the boot partition, the other is GambOS.
Boot the Raspberry Pi from microSD.
Next, unmount the microSD card and put it into the proper slot on the Raspberry Pi. Connect the hdmi cable to a monitor or TV, have a keyboard and mouse attached, and power up the Raspberry Pi.
Note that the default keyboard installed is English (US) English (US,intl.,with dead keys). See illustration below.
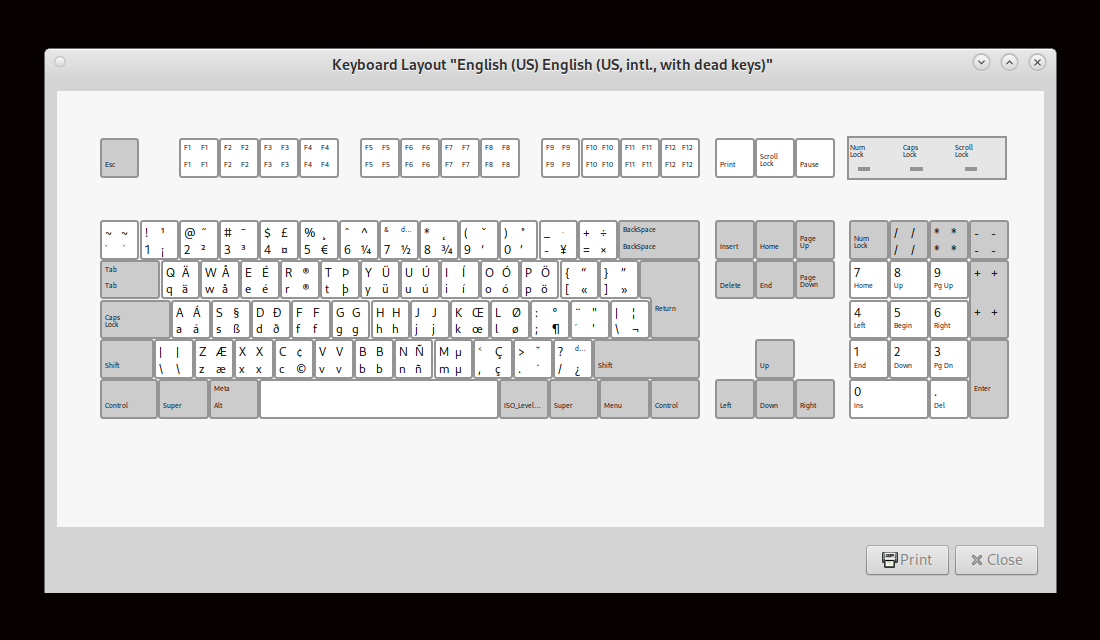
Keyboard layout installed
The symbols on the left of the above keys is the default when pressed. Use the above illustration to your advantage when using another keyboard to login for the first time.
Login.
The system will boot into the GambOS desktop login. You can login with user gbuser password gambos and hit Enter on your keyboard. Now type gambos again, and you will be asked to enter a new password, hit Enter again and confirm your new password.
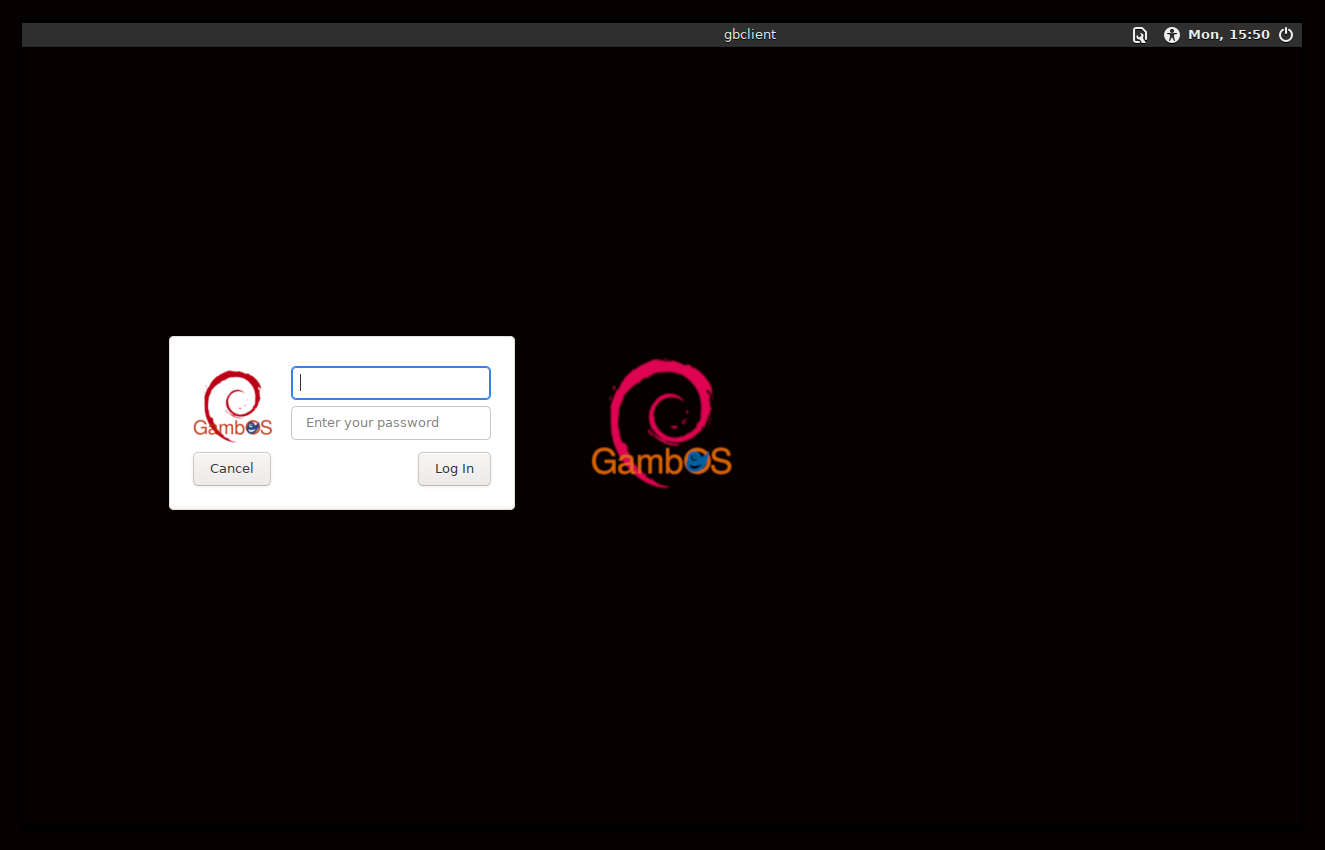
Login after boot
After a succesfull login, you will be welcomed by GambOS Dashboard.
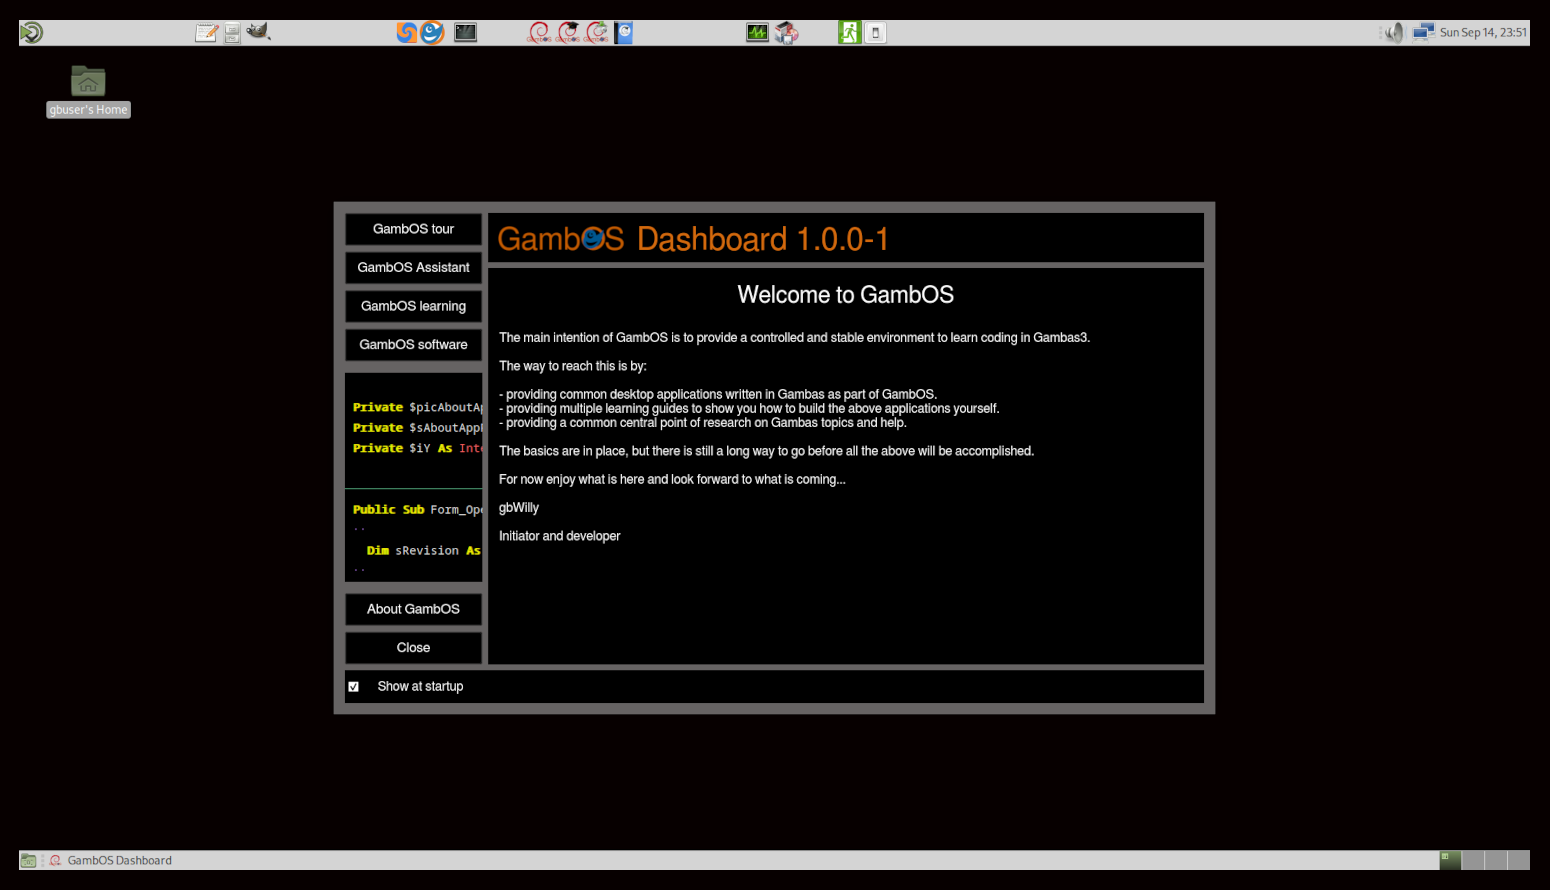
GambOS Dashboard to guide you around
Click on GambOS tour on the 'Dashboard' to get an quick impression of what GambOS has to offer.
Change keyboard layout to your preferences
If you have a different keyboard layout, now is the best time to change it. Click in system menu System -> Control Center to open the Control Center dialog. Next, click on the Keyboard icon to open the Keyboard preferences dialog.

Keyboard preferences, Layouts tab
Click on the Layouts tab, then on the Add.. button to add a layout of your choice. Make sure that once you have added it to move it to the top of the list to have it applied.
Change timezone to your preferences
The default timezone GambOS is set to is Greenwitch Mean Time (GMT). To check this open MATE Terminal from the panel and type:
In terminal:
timedatectl
This will return the current set timezone.
Local time: Sat 2025-09-27 12:25:23 UTC
Universal time: Sat 2025-09-27 12:25:23 UTC
RTC time: n/a
Time zone: Etc/UTC (UTC, +0000)
System clock synchronized: yes
NTP service: active
RTC in local TZ: no
To get a list of all available timezones type:
In terminal:
timedatectl list-timezones
This will return a multiple screen long list of available timezones starting with a.
Africa/Abidjan
Africa/Accra
Africa/Addis_Ababa
Africa/Algiers
Africa/Asmara
Africa/Asmera
Africa/Bamako
Africa/Bangui
Africa/Banjul
Africa/Bissau
Africa/Blantyre
Africa/Brazzaville
Africa/Bujumbura
Africa/Cairo
Africa/Casablanca
Africa/Ceuta
Africa/Conakry
Africa/Dakar
...
Simply press spacebar on your keyboard for the next page and continue until you get to the one you need. Press q key to leave the listing.
To set your timezone you will need to do:
In terminal:
sudo timedatectl set-timezone your_time_zone
In my case, I need to replace your_time_zone in above command with Europe/Amsterdam. Yours might be different
With time and keyboard set, you are ready to start your adventure.
My advise is to first run the GambOS tour in GambOS Dashboard to get a quick impression of what is available and why. When new to Linux I strongly advise to first install and study GambOS Background Guides - Book 1: Introduction to GambOS before starting with the Gambas guides.
You can install the guides from GambOS Software Center that comes pre-installed on your system.
Happy GambOSing...